Active Issues
![]()
|
The Active Issues section on the Home page allows you to keep track of any carrier issues and discuss resolutions with your freight forwarder without having to leave Carrier Allocation. |
Carrier Allocation will automatically generate an issue when the carrier:
Rejects volume
Changes a Vessel Schedule resulting in a Blank Sailing
Marks volume as Pending
Does not respond to a request for space on a vessel
|
Tip: Click the Vessel link to view the history of the voyage by Plan Week for the carrier voyage.
Figure 1: Vessel Link - Voyage History
Click the information icon (
Figure 2: Information Icon - Calendar Date |

 ) to
view the calendar date of the Plan.
) to
view the calendar date of the Plan.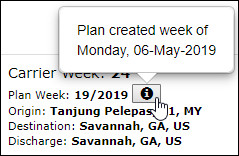
|
Note: If there is volume that has been rejected and the carrier revises their response to accept all of the previously rejected volume, the issue will be automatically closed by the system. |
1 Click Add New Issue to create a new issue.
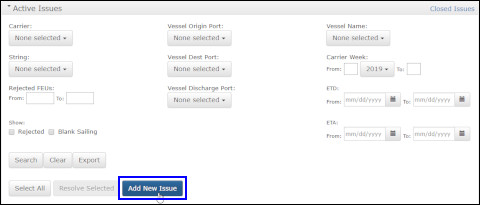
Figure 3: Add New Issue Button
2 The New Active Issue pop-up window will appear. Enter a Title and Comment.
If you want to attach a file to the issue, you can click Choose File and select a file from your computer.

Figure 4: New Active Issue Pop-up Window
3 Click Save Issue. The issue will appear in the Active Issues section.
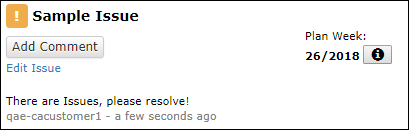
Figure 5: New Active Issue
4 You can click Edit Issue to bring up the pop-up window and change any of the fields.
You can attach a file to an issue at any time by clicking Edit Issue or Add Comment.
|
Note: If there is volume in Pending status, you cannot resolve those issues from the customer side. The carrier must resolve any pending volume. |
1 When you want to close an issue because it is no longer relevant or has been resolved, click Add Comment for the issue that you want to close, enter a comment, and click Save and Close Issue.
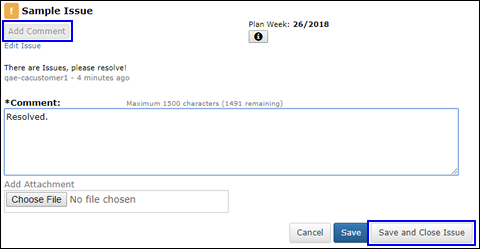
Figure 6: Close Issue
2 For issues that have been automatically generated by the system, click Resolve and then fill in the Resolution section and click Save or Save and Close Issue.
You can also select the check box next to multiple issues and resolve them at the same time by clicking Resolve Selected. Any comments or attachments you make will be made to all selected issues.
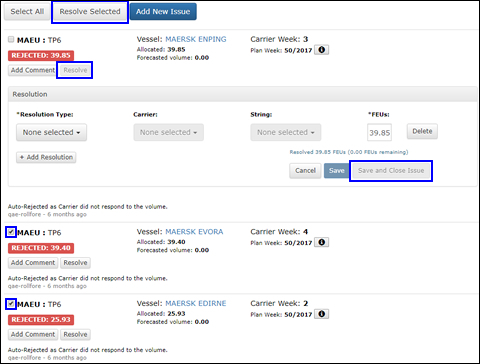
Figure 7: Close Automatically Generated Issues
3 The closed issue will appear in the Closed Issues page, which you can access by clicking the Closed Issues link in the upper right-hand corner.

Figure 8: Closed Issues Link
4 On the Closed Issues page, you can search for specific issues and export the issues as a CSV file by clicking Export.
You can also view attached files and attach additional files to closed issues in the Comments column.
The Attachments column shows all files that have been attached to the issue.
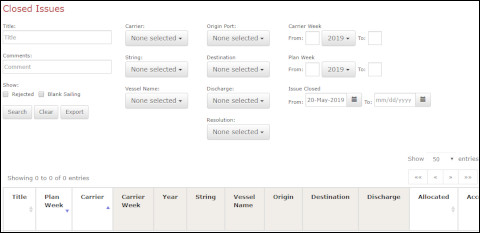
Figure 9: Closed Issues Page
![]()
1 To re-open a previously closed issue from any plan week, go to the Closed Issues page and in the Comments column for the issue you want to re-open, click Add Comment.
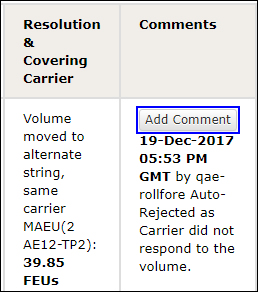
Figure 10: Add Comment Button
2 The Add Comment pop-up window will appear. Enter a Comment and select the Re-Open Issue check box and click Save to re-open the issue.
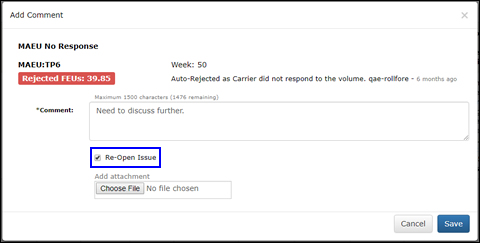
Figure 11: Re-Open Issue Check Box
3 The issue will appear on the Home page, Active Issues section.
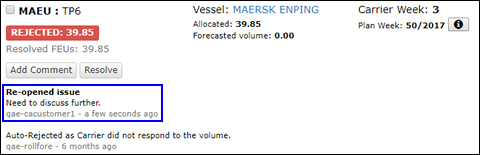
Figure 12: Active Issues
![]()
![]()
© 2021 Property of Expeditors International of Washington, Inc. and its subsidiaries.
Business Confidential and Proprietary. Reproduction by written authorization only.
- Created by: Expeditors Technical Communications Department -